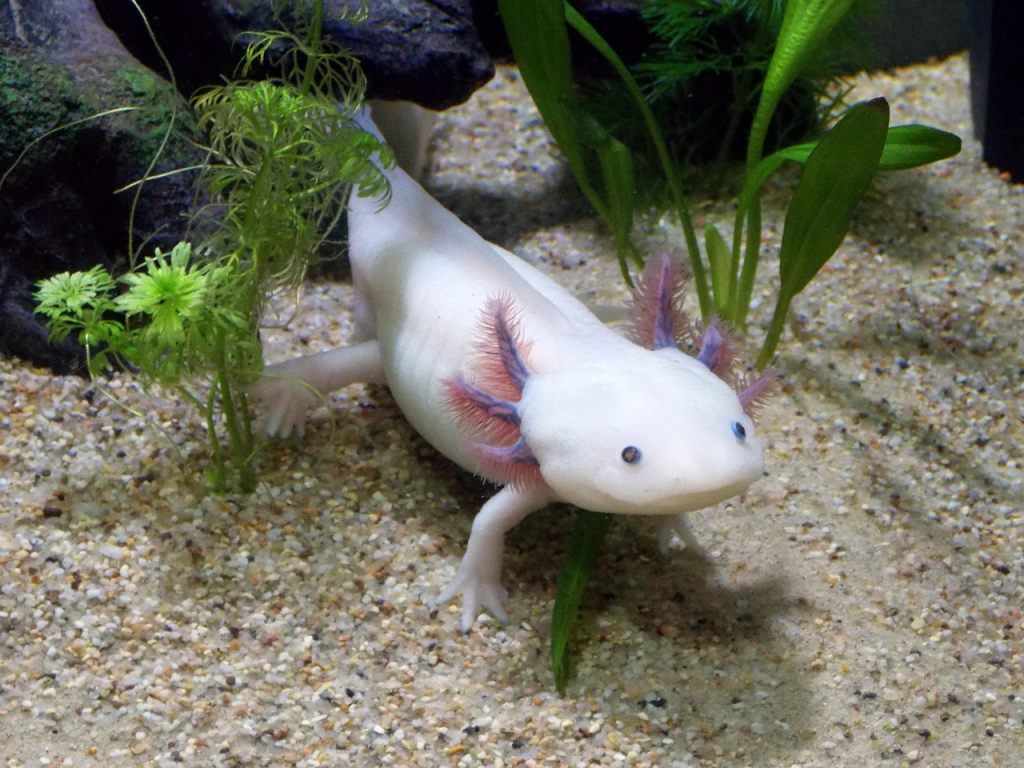
How to Cycle an Axolotl Tank: Step-by-Step Guide for a Healthy Habitat
You’ve decided to care for an axolotl—awesome choice! But here’s the thing: before your axolotl moves into its new home, the tank needs to be ready. That’s where cycling comes in.
Cycling isn’t just a fancy term—it’s how you make the tank safe for your axolotl by creating the right balance of good bacteria.
This guide will walk you through everything you need to know, step by step. No confusing jargon, no unnecessary fluff—just practical advice to give your axolotl the perfect environment to thrive.
What Is Tank Cycling and Why Does It Matter?
Cycling a tank is all about establishing beneficial bacteria that help process waste. When your axolotl eats or poops, ammonia builds up in the water.
Ammonia is toxic, even in small amounts, but bacteria can break it down into nitrites and then into nitrates, which are much safer. Skipping the cycling process puts your axolotl at serious risk of ammonia poisoning.
Axolotls reach sexual maturity at approximately 6 to 12 months of age, allowing them to begin reproducing shortly thereafter.
A properly cycled tank provides a healthy environment and makes maintenance easier in the long run. Without cycling, you’ll find yourself battling cloudy water, algae blooms, and stressed-out axolotls. It’s worth taking the time to do it right.
Setting Up the Tank for Cycling
Here are the steps:
Choose the Right Tank Size
Axolotls need space to move and explore. A 20-gallon tank is the minimum for one axolotl, but bigger tanks are easier to cycle and maintain. If you’re planning to get multiple axolotls, aim for at least 10 gallons per additional axolotl.
Install the Essentials
Before you start cycling, make sure the tank is fully set up with all the equipment:
- Filter: Go for a sponge filter or a gentle canister filter to avoid strong currents.
- Substrate: Use sand or leave the bottom bare. Gravel can cause impaction if swallowed.
- Thermometer: Axolotls prefer water temperatures between 60–68°F.
- Dechlorinator: Tap water often contains chlorine, which kills beneficial bacteria. Add a dechlorinator to make the water safe.
- Test Kit: Invest in a liquid test kit (not strips) to monitor ammonia, nitrites, and nitrates.
Fill the Tank With Water
Use treated tap water or dechlorinated water to fill your tank. Remember, you’ll need to maintain this water quality consistently during and after cycling.
Two Popular Cycling Methods
The popular cycling methods:
Fishless Cycling
Fishless cycling is the safest way to prepare a tank for an axolotl. Here’s how to do it:
- Add Ammonia Source: Introduce pure ammonia or an organic source like fish food. Aim for 2–4 ppm of ammonia.
- Test Regularly: Use your test kit every few days to track ammonia, nitrite, and nitrate levels.
- Wait for Nitrites: After a week or two, you’ll notice ammonia levels drop while nitrites rise.
- Look for Nitrates: Once nitrites drop to zero and nitrates appear, the cycle is nearly complete.
- Perform a Water Change: Before adding your axolotl, do a large water change to bring nitrate levels below 40 ppm.
The incubation period for axolotl eggs is generally around 2 to 3 weeks, after which the larvae emerge.
Seeding From an Established Tank
Seeding speeds up cycling by introducing bacteria from an already-cycled tank. To seed your axolotl’s tank:
- Add some filter media, substrate, or decorations from a healthy, established aquarium.
- Continue testing the water to ensure the cycle is progressing.
Monitoring the Cycle
How to monitor the cycle:
What to Test For
Your test kit will measure three key parameters:
- Ammonia: Toxic to axolotls, even in small amounts. Aim for 0 ppm.
- Nitrites: Also harmful. These should drop to 0 ppm before adding your axolotl.
- Nitrates: Safe in moderate levels. Keep them below 40 ppm with regular water changes.
How Long Does Cycling Take?
On average, cycling takes 4–6 weeks. The timeline depends on factors like water temperature, the presence of seeded material, and how much ammonia you add. Patience is crucial—rushing the process can harm your axolotl.
Signs Your Tank Is Fully Cycled
You’ll know the tank is ready when:
- Ammonia and nitrites consistently test at 0 ppm.
- Nitrates are present but manageable.
- The water is clear and smells clean.
Tips for Keeping Your Cycle Stable
How to keep it stable:
Avoid Overfeeding
Overfeeding can lead to excess waste, which causes ammonia spikes. Feed your axolotl small portions and remove uneaten food within 10–15 minutes.
To maintain an axolotl filtered tank, change 20% of the water each week and clean the substrate with a siphon.
Perform Regular Water Changes
Even in a cycled tank, nitrates build up over time. Change 20–30% of the water weekly to keep levels safe. Always treat new water with a dechlorinator before adding it to the tank.
Clean the Filter Gently
Beneficial bacteria live in the filter, so avoid over-cleaning it. Rinse filter media in tank water during water changes to preserve the bacteria colony.
Monitor the Temperature
Axolotls thrive in cool water. Higher temperatures can stress them and disrupt the cycle. Use a reliable thermometer and, if necessary, a chiller to maintain a stable environment.
Common Cycling Problems and Solutions
Problems and solutions:
Ammonia Stalls
If ammonia levels stay high for weeks, the cycle may be stalled. Check your water temperature and ensure it’s within 60–68°F. Adding more bacteria through seeding or a bottled bacteria product can help.
Nitrite Spikes
High nitrites can harm your axolotl, even during cycling. If nitrites get too high, do a partial water change to dilute them. Make sure your filter is running efficiently.
Cloudy Water
Bacterial blooms often cause cloudy water during cycling. This is normal and usually clears up on its own. Avoid adding chemical clarifiers, as they can harm bacteria.
Preparing the Tank for Your Axolotl
Once your tank is cycled, do a final check:
- Test ammonia, nitrites, and nitrates to confirm levels are safe.
- Ensure the water temperature is stable and within the ideal range.
- Add hiding spots like caves, plants, or PVC pipes for your axolotl’s comfort.
Before introducing your axolotl, acclimate it to the tank by floating its bag or container in the water for 15–30 minutes. Slowly add small amounts of tank water to help it adjust.
Why Cycling Sets the Foundation for Success
Cycling might feel like a lot of work, but it’s the foundation for a healthy, happy axolotl. Skipping this step can lead to stress, illness, or worse. By taking the time to cycle your tank properly, you’re giving your axolotl the best possible start.
Ready to Create the Perfect Home?
Now that you know how to cycle an axolotl tank, it’s time to get started. Follow these steps, stay patient, and keep testing the water. Your axolotl will thank you with its adorable smile and playful antics.
So grab your supplies, and let’s make your tank the perfect home for your new aquatic friend!
References
How to Cycle Your Aquarium – Axolotl Central
How do I cycle a tank? – Reddit
New Axolotl Tank: Best Way to Properly Cycle – Caudata.org
Axolotl Tank Cycling – MorphMarket Community
Didn’t Cycle Axolotl Tank – Aquarium Advice
Disclaimer
This content on Bagrica is for informational purposes only. Consult a professional for pet care or farming advice. Bagrica is not liable for any actions taken based on this information.
We Recommend You Also See

Can You Have Two Axolotls in the Same Tank?
How to Adopt an Axolotl


No Comment! Be the first one.